Well, are you ready to see my new toy work horse? I've spent a lot of time in the studio taking turns at running the longarm and cleaning and organizing. All the effort is now starting to show up. I have one large quilt off the longarm and another ready to quilt. The sewing machine area of the studio is clean and in better order than it has been for a long time. It's still not a showcase because I use a lot of recycled items for new purposes but it is very functional.

I really love the bright LED lights on the new machine! They can be this bright or dimmed.
There is 11.25" of room between the needle and the side of the machine. Even with the longarm there are still some things I like to quilt with the walking foot. I haven't tried the snazzy one that came with the machine yet but it is adjustable.

Here are my three sergers. I didn't have a machine on this table before. I haven't used the two on the left in over ten years so I took them out, cleaned them up and ran them a little. They are working fine but the one on the left needs some adjustment made to the cutting blade. I haven't figured it out yet but I will. I'm thinking of putting one in the longarm room since I frequently serge the edges of the quilts before I load them. Then I'm thinking of setting the other two up for different stitches so they will be ready to use for different things. I usually serge the edges of new fabrics before I wash them. A three thread stitch works fine for that. Four thread stitching is what is used for garment construction although I've used it for more pillowcases than clothes in the last few years.

I moved the Janome 6600 to the desk I had been using for the serger. I managed to fill up the rolling cart on the right with projects that were in the area. I'd love to get some of these finished soon. Several of them are leader and ender projects and several others were 'discovered' in the cabinet over the desk. I cleared out the right side of it to hold embroidery supplies so they would be handy.
I also hung up a paper towel holder that I had bought last year. I had a hard time deciding where to put it. I always keep paper towels handy in the sewing and longarm rooms. I use them for cleaning and many other things.

I found a home under the desk for the rolling case that the machine will travel in, if I take it anywhere. The plastic drawers had been where the rolling cart is now. The big thick book to the right of the machine is the instruction manual. I'm only about 40 pages into it so far which got the bobbing wound and the machine threaded. The automatic needle threader is so cool!

This desk was a Goodwill find for $25 a few years ago. It is formica covered particle board and weights a ton!! The men in the family had more than a few choice words to say while moving it. After living with it for a while I decided the gray was depressing and bland so I grabbed the colorful letters and have fun 'writing' messages to myself. I am in touch with my inner child as you can see. Hee-hee!! I added the mirrored circles to reflect some light in the dark overhang too.
The four sewing machine cabinet drawers I found antiquing in the mountains and they had been sitting on the floor collecting dust for over a year. I cleaned them up and put them to use holding some of my decorative threads.
The Quilting Lines sign once hung at the entrance to my quilt shop. The shelves to the left hold a few projects but most of the recycled meat containers hold scraps sorted by color. The brown bag on the left holds the embroidery unit for the machine.
The top of the desk holds some of my collectibles and antiques. I'll have to share them another day.

Another cool feature on the new machine is the laser positioning guide. You can use it to line up the sewing line or move it around to line up with the edge of your fabric. There is also a laser point at the needle for lining up embroidery.
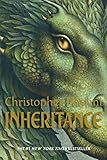
To prove how many hours I've put into my quilting and organizing I tell you what I listened to while I was working. Inheritance by Christopher Paolini is the fourth book in the Inheritance Cycke that started with Eragon. The audio book was 24 discs long. If you are a J.R.R. Tolkien fan you will enjoy this series. The series got deeper and more complex as it went along. Nothing like a good story with dragons and elves.
That's what I've been up to. I have a few shots of the quilting I did but I'll share those in another post.



